How to share your documents with a registered organisation
You can easily share a document with a registered organisation directly using the following steps:
Step 1: Log in to the learner portal at https://www.myequals.net.
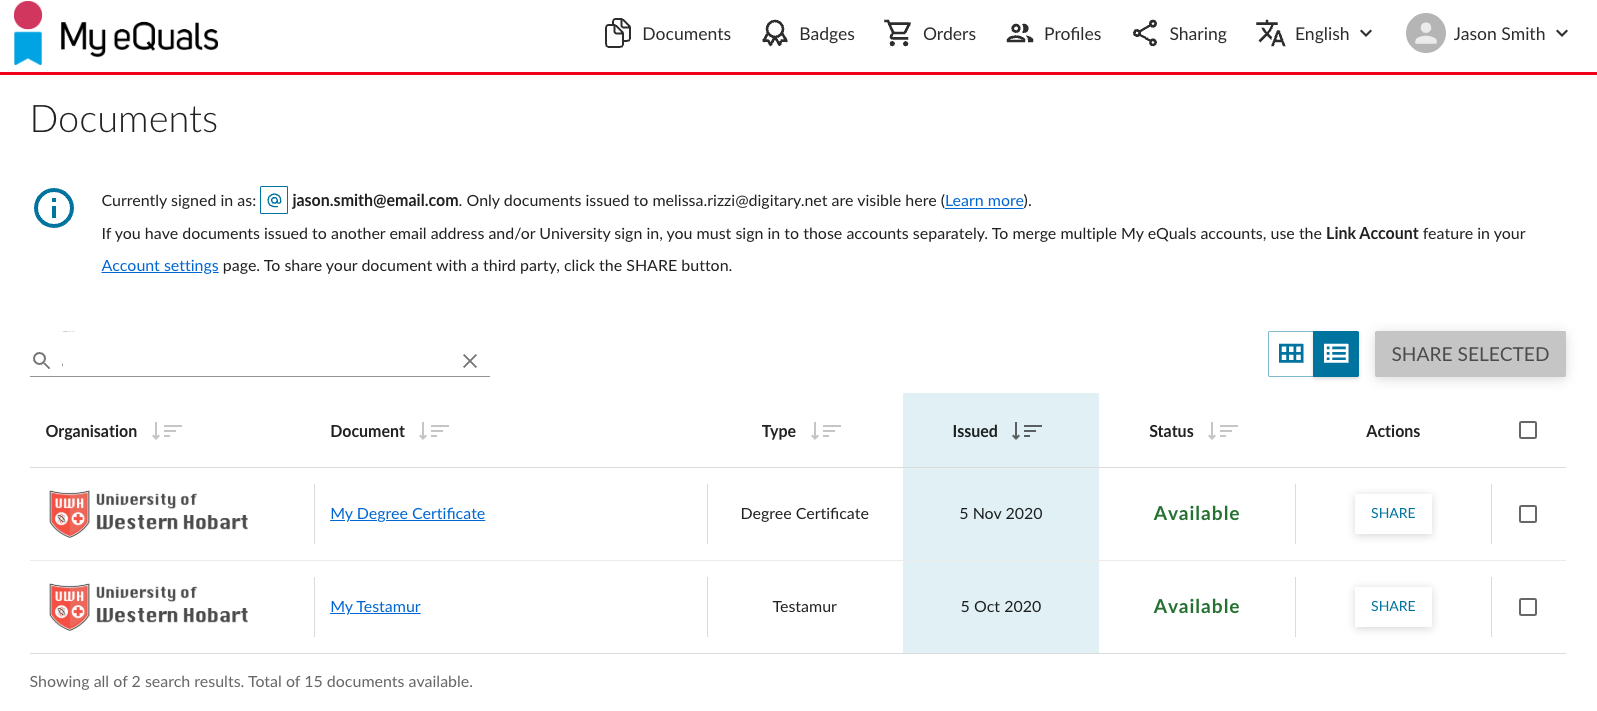
Step 2: Navigate to the document page and locate the specific document you want to share. Click on the "SHARE" button in the Actions column.
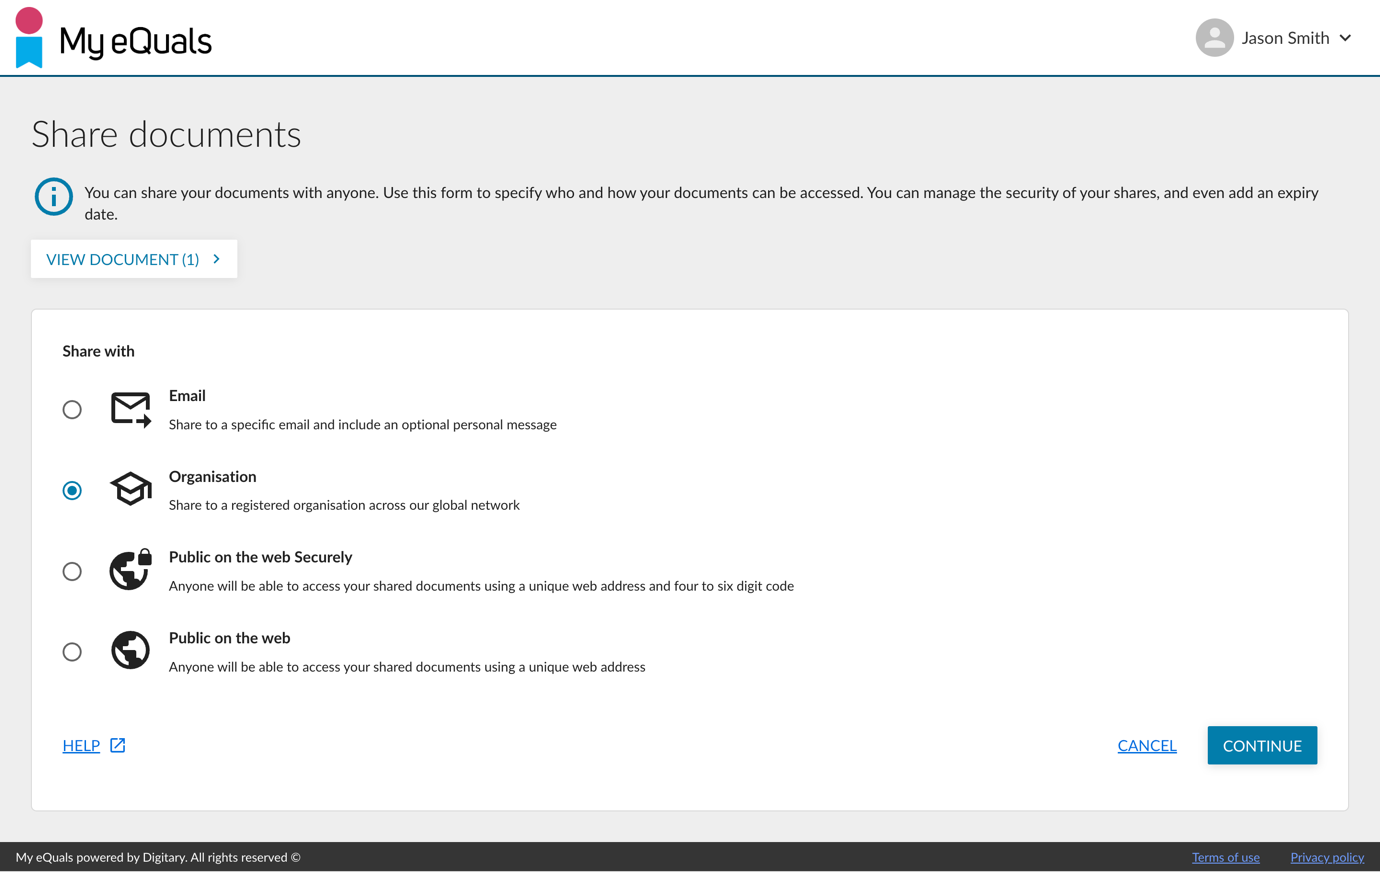
Step 3: Select “Organisation”. Then click CONTINUE.
Step 4: You can enter the details required.
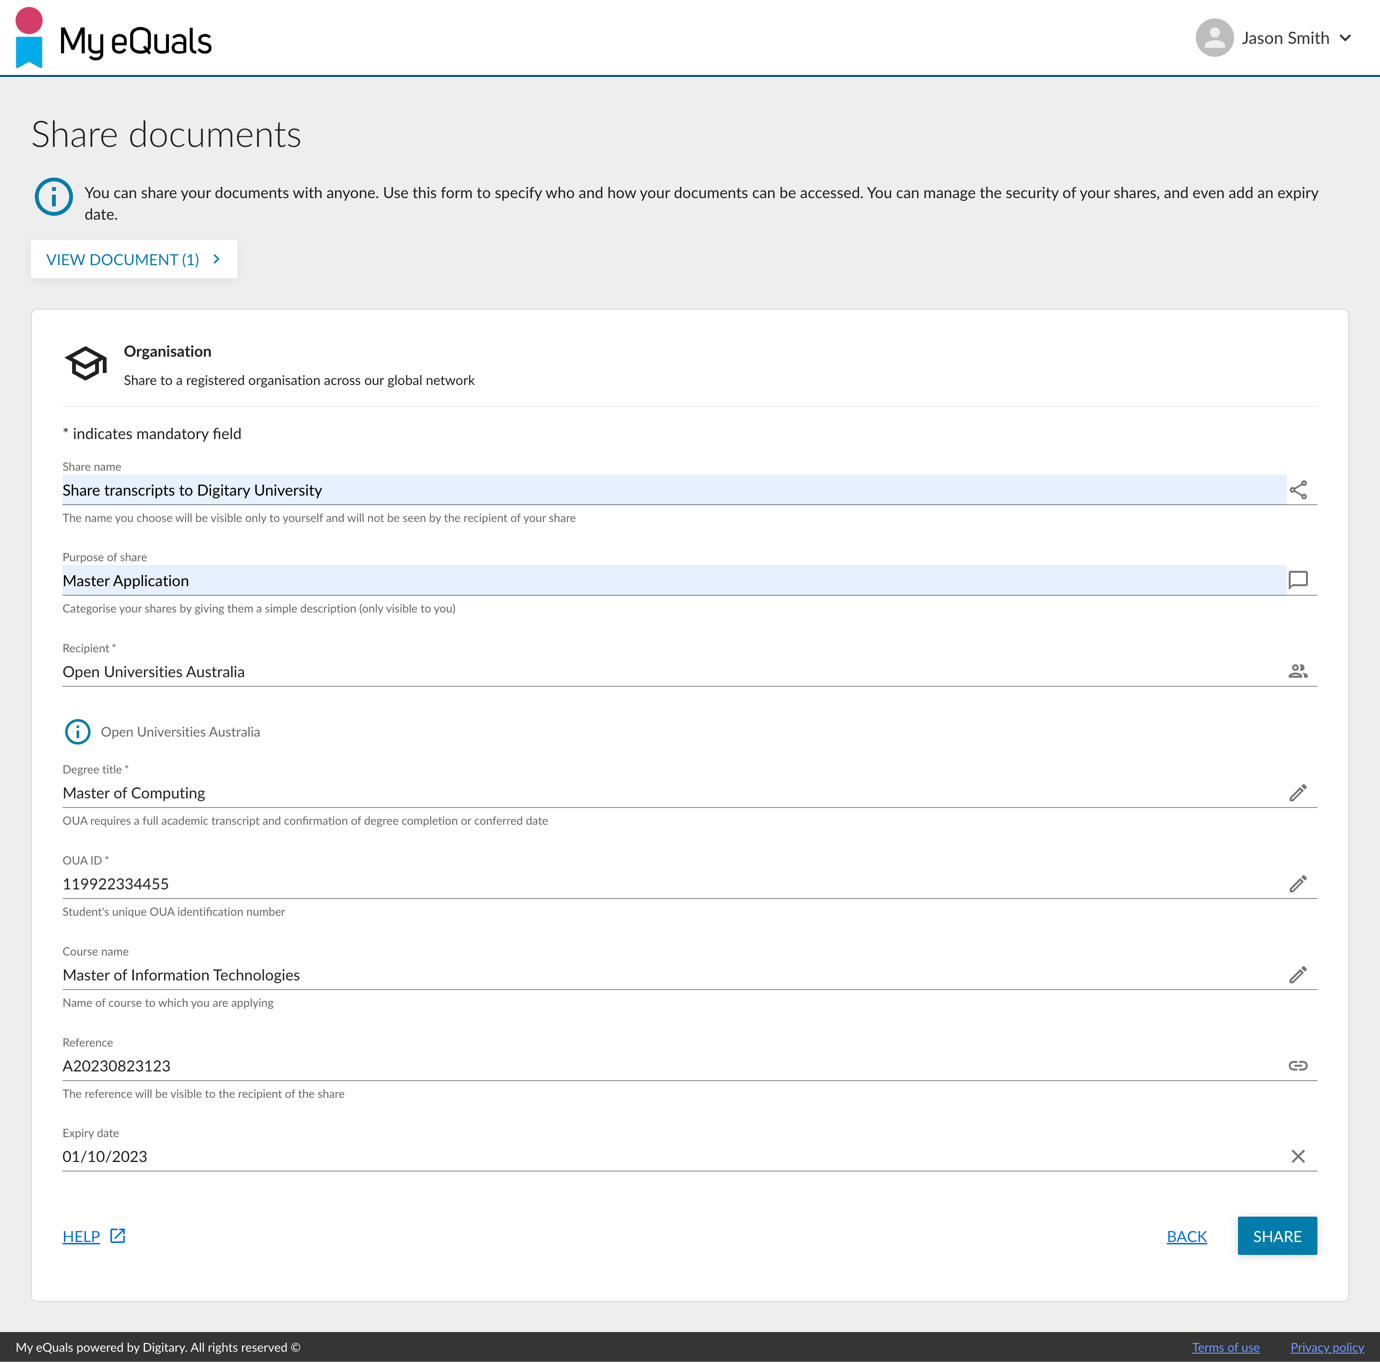
Name your share. This name will only be visible to you and not to the recipient.
Describe the purpose of the share for your own categorisation.
Enter the recipient institution’s name.
If the institution has requested more information from you, such as course name, you will be asked to fill this out at this stage.
If you like, provide a reference that will be visible to the recipient.
You can add an expiry date to limit the visibility of the share until that date.
The box to allow the recipient to download your document is checked by default; uncheck if you prefer.
Then click on the "SHARE" button.
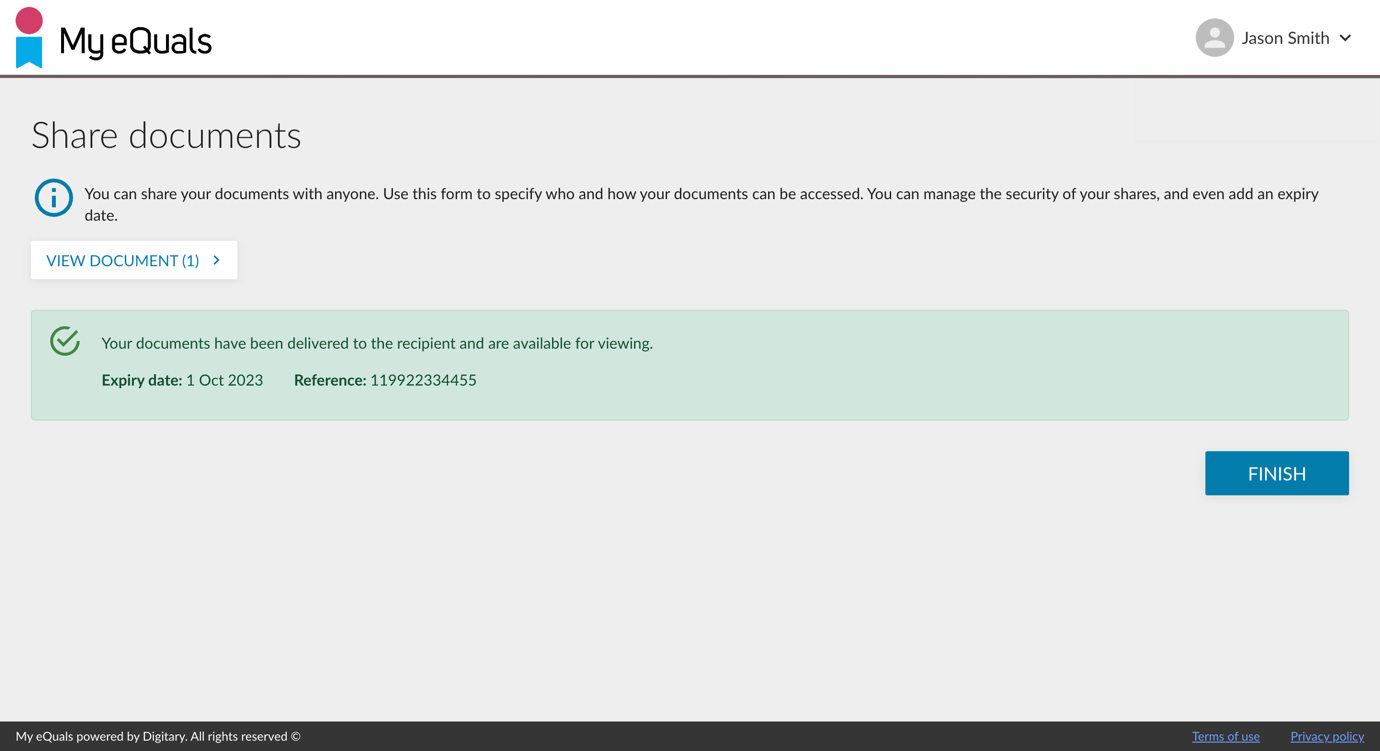
Step 5: Once you have completed the share setup, your share will be sent to the registered organisation. Click the "FINISH" button to finish the process.
Once the share has been created, you can click SHARE next to your name on top of the page to view and edit your share.
Please Note:
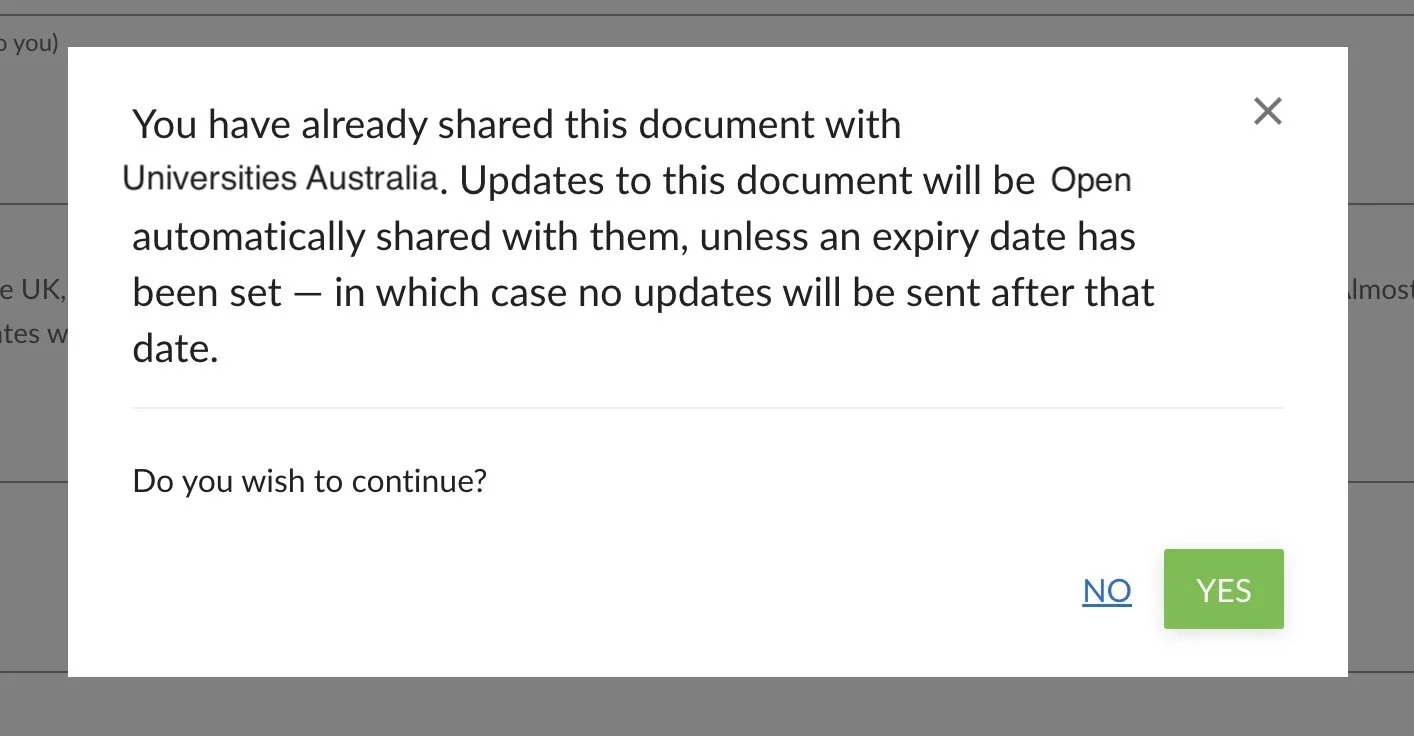
Multiple share of same document - If you have previously shared a document with the same organisation the system will show an alert to let you know that you may not need to reshare: updates to the document are automatically shared by the share recipient (unless an expiry date on the share has passed).
Share fails - You will be notified by email if a share fails for any reason to reach its destination. If you have used a share credit, it will be returned to you.